
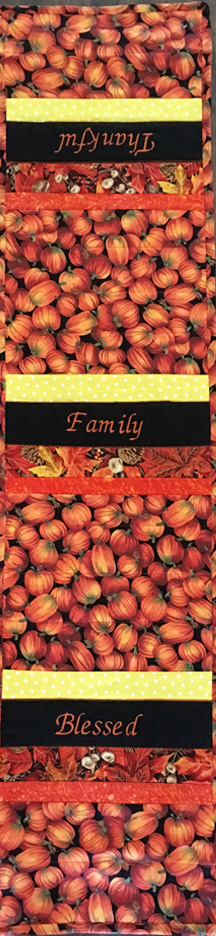
In the video, they used equal 2.5 inch wide strips. In my case, I wanted to use fabric from my stash so my strips would feature varying widths. The pumpkin fabric was my largest remnant, providing enough fabric for the backing, binding and large strips. The search was on to find three-to-four more fabrics to match with enough available to make at least three, one-inch wide strips.
 Next to planning.
I use a primitive method, a free spreadsheet application on my laptop. That limits me in accurately designing the project graphically, but gives me enough of a guide to wing it. So far it has worked.
Another issue was the length of the backing. In order to have a long enough piece, I had to splice in fabric. Rather than have one seam at the end of the runner, I added half to each end, hoping it would look more balanced, in case I ever opted to use the backside.

Like in the video (link), I started with the middle strip and worked my way down one side and then the other. With all the strips sewn, I added a decorative stitch along the seam of the black strips for a little emphasis. OK, honestly, it was needed to tack down a small section on one of the black strips where it wasn't caught in the seam. Unfortunately, I didn't notice the 1 inch gap until several strips later and didn't want to seam rip all the strips. I've learned from experience, there's always a way to fix things if you keep your mind open to possibilities.
The final step was to add the binding. First, the binding needs to be made and machine-sewn to the quilt edge. Crafty Gemini has a pretty good video but I don't like how she joined the ends of the binding (around the 6:50 mark). Missouri Star Quilt Company is another good resource and their video has a different way to connect the binding (video link), which I'm interested in trying. I have a third way I learned years ago and I'll share that in a future post.
I prefer to do the final step by hand (video link-Crafty Gemini). There is something calming and relaxing in the delicate hand sewing, making sure stitches are evenly spaced and hiding them under the binding. Yes, it takes a little longer than machine binding, but I like the satisfaction of hand-sewing and the final look it gives the project.
Another benefit of hand-sewing the binding is a chance to reflect on the project. For instance, while I was sewing this binding, I realized that all the fabric scraps were from projects I made for family members. The words (blessed, thankful, family) were more appropriate than I realized. My quick fall table runner ended up having more meaning than originally planned and I will treasure the memories for years to come.
No comments:
Post a Comment